Tuesday, May 30, 2017

A Walk Around The Garden

Slowly but surely the garden beds are coming to life.  This is my favorite part of the whole gardening year.  I love the anticipation of waiting for the seeds to come up once I get them in the dirt.  Some crops like radishes and lettuces are fast and only take 3-5 days to germinate.  Other crops take weeks to germinate and the seedlings are so tiny that it is hard to see them once they do come up.  The first to appear were the Sweet Meat Squash that I planted in the long row along the fence.

Next up was the Glass Gem Corn that I planted in one of my new beds on the south side of the garden.

The Calima green beans had started to appear right before that last snow storm and I lost some of the first ones that germinated.  Others were slower to get going and were protected under the grass mulch and have begun to push their way up into the sunshine.  I may have to replant this bed in a few places, but I will give it a couple more weeks to fill in.

My annual herb bed that is growing dill for my pickles and coriander (cilantro) for my salsa has started to come up as well.  These are sensitive heat loving crops, so hopefully we don't get any more late spring surprise snowstorms.  This bed also holds a row of carrots and parsnips to be harvested much later in the season.

The broccoli bed is looking a little stressed after transplanting.  We have been having a lot of very windy days here and the plants have had some damage.  I hope they will get over this little shock soon so they can fill out before the really warm weather hits.

The peas and spinach are just about peaking and I expect to start getting a small harvest from the peas in just a few days.  The spinach has been supplying my salad needs for the past couple of weeks.


The onions are quite happy though a little wind blown and even my tiny home started seedlings are starting to look quite robust, though nowhere near as large as the sets that I planted.  The shallots that I planted at one end of the onion patch are looking happy and some are already sending up flower stalks.

I am thrilled about how healthy my garlic patch is looking.  Many of the stems are an inch thick and the plants are tall and filling in well.  I keep checking for scapes among them, and have a feeling that they will appear in the next few weeks.

The potatoes really took at hit with that last snowstorm.  The Yukon Gold and the Chieftain Potatoes died back to the mulch.  Anything below the mulch still looks like it might grow, so hopefully they will make a comeback.  The Purple Viking Potatoes fared much better and had very little frost damage.

The Strawberries have flowered very well on the few plants that made it to this year.  I think they will mostly be for snacking on as they ripen since I won't have enough for preserving this year.  Once the crop is done I am hoping these plants put out many runners to expand the bed next year.


Saturday, May 27, 2017

Filling in the Perennial Herb Garden

Last year I made a halfhearted attempt at starting an herb garden in the corner of the large bed around the tree.  This bed was filled with ragweed and cheat grass and I couldn't quite keep up with it last year.  I had planted mint, oregano, chives, and thyme, most of which survived the winter despite my neglect.

This weekend I took the time to pull all the weeds that had started to fill in the gaps between the herbs.  I noticed that I had plenty of room for more herbs, so I went to my local nursery and picked up a few more starts of mint, lemon balm and chamomile.  Chamomile is technically an annual, but generally does a good job of reseeding itself year after year, so I added it to the perennial herb patch.


When I get another delivery of grass clippings I will mulch the bare ground in this area.  I am hoping that the thyme, oregano and mint spread out to fill in this corner of the bed.  In the other corner is a spring bulb garden and the back half I have planted with a mixture of wild flowers.  One area still is in dire need of weeding, but I haven't had time to tackle that yet.  I am hoping to help this bed become a low maintenance perennial flower and herb garden.  If I can keep up with the weeding and watering there is a chance that it will look quite nice by the end of the summer.

Wednesday, May 24, 2017

Trellis Construction and Planting Cucumbers

This year's cucumber patch is going to be devoted to growing mostly pickling cucumbers.  I did plant a handful of slicing cucumbers at one end of the bed just to add a little variety to my cucumber bed.  Last year I used a trellis in my cucumber patch and it worked out so well, that I planned to use that trick again this year.

When I plant a bed I always start from the ground up.  This means that I needed to do the final preparations to the soil to make the bed ready for planting.  I pull any visible weeds from the bed, then run a hoe through the whole bed to loosen up the surface layer of soil.  Once that is nice and fluffy, I run a rake over the bed to smooth out any low or high points.  The rake also removes any large rocks or debris to make a nice even planting surface for tiny seeds.

The next step was to set the t-posts that are going to support the trellis.  I lined them all up as straight as possible and pounded them into the ground.  I only used four to span this twenty foot bed, placing one every six to seven feet down the length of the bed.  Then I attached one end of the chicken wire to the end post and stretched the fencing down the bed, attaching it to the t-posts with baling twine.  I used a roll of chicken wire that was four feet tall and twenty five feet long with large holes that were two inch hexagons.  The larger holes will make it easier for the cucumbers to climb the trellis.

Once the trellis was set up I installed a line of drip irrigation on either side of the fence.  I planted the cucumber seeds on either side of the fence in a zig zag pattern.  I am hoping they all grow vigorously enough to fill in the whole trellis.After planting all the seeds, I turned on the water to make sure that the lines were flowing well before I began to cover them with mulch.

I laid down a layer of mulch that was about an inch or so deep.  I didn't want to put down too thick of a layer that would make it difficult for the seeds to germinate and push their way up to the sunlight.  If I have trouble with weeds in this bed, I can always add a thicker layer of mulch after the cucumbers have germinated. 
 I let the whole garden have a nice drink while I finished mulching in this bed.  In a few weeks I hope to see this bed come to life with two new rows of cucumbers.  This bed is twice the length that I planted last year, so I am expecting to have a very busy pickling season this summer.  I will enjoy the calm I have now knowing that I will have plenty of work ahead of me in a few months.

Sunday, May 21, 2017

Sunflower Sprouts

At the front of my yard, nearest the road I have three long beds that run the length of the fence.  There I planted what will become a colorful screen for my yard.  The row nearest the garden was planted with giant sunflower seeds.  In front of that is a row of a variety of red and yellow sunflowers that I planted from seed I saved last fall.  Both of those rows had excellent germination after I planted them a mere week ago.  The last row was planted with Hopi Red Dye Amaranth which won't grow as tall as the sunflowers, but will add a depth of color and texture to the screen when viewed from the road.  In between stands of the amaranth I planted Sweet Meat winter squash which I am hoping will become a ground cover along the fence line towards the road.  It is a nice sight to walk down a row and see that nearly every seed that I planted has started to come up.  It looks like I will have a stunning display of color in my yard once things really get to growing!

Friday, May 19, 2017

Late Season Cold Snap

The last frost for my area averages around May 10th.  Using this date I plan when to plant various crops.  I plant the cold hardy crops a few weeks before this date, and plant the heat loving crops anytime after this date.  This year proved that even the last frost date for an area is still only an average.

The weather had been staying fairly warm for the past several weeks, though we have had our fair share of wind.  I had been checking the weather and it called for temps above freezing for all the days leading up to the last frost date so I took the liberty of planting a few crops a little early in an attempt to get a head start on the season.  I planted the corn and beans about 2 weeks before the frost date and the squash and cucumbers the week after that.  I was happy to see that the corn and beans wasted no time in coming up, but then the weather took an unexpected turn.  The forecast changed to snow/sleet/hail and rain with temps hovering in the 40s during the day and dipping into the upper 20s overnight.  I was going to have to cover my tender young crops and hope for the best.

Luckily I had salvaged the plastic that I used on my low hoop tunnels and used them to cover sections of the garden that needed protection.  They were just long enough to cover the longer beds where the corn and potatoes were growing and I used a couple of them to cover several of the shorter beds in the middle of the garden.


I am happy that I waited until the frost date to plant my summer squash, watermelons and cucumbers. They are under a mulch layer and haven't come up yet, so I didn't have to worry about losing the young seedlings.

We had about an inch of heavy wet snow two nights ago and am still expecting a freeze tonight, so the plastic will be staying on the garden for at least one more night.  I peeked under the cover on the corn and beans and so far everything that had come up seems to be alright, if just a little smashed.  The potatoes seem to have fared alright as well, though I expect to see some frost damage on the outer leaves.  The lettuce that have sprouted are reveling in the protection and cooler weather and have thrived despite the snow.  Soon it will be time to plant the next row in this bed and fill the garden in just a little bit more.

The long rows at the front of the yard were too long to use my plastic sheeting on, so I used more grass clippings to cover the winter squash that had come up along with the amaranth that was planted here.  I intended to mulch these beds anyways, so this just forced this job to get done in a hurry.  I didn't bother to clear the mulch away from the plants as I want it to act as a blanket for a few days.  Once the weather gets nice again, I will go down the row and uncover the seedlings underneath the mulch.  Time was short and the temps were dropping fast while the work was getting done, so I decided to leave the sunflowers uncovered.  They would have to fend for themselves, but they seemed to tolerate a few colder nights after they first sprouted several weeks ago, so I am hoping they can make it too.  If not, I still have plenty of seeds to plant in those rows if I need to.

Monday, May 15, 2017

April Showers Bring May Flowers

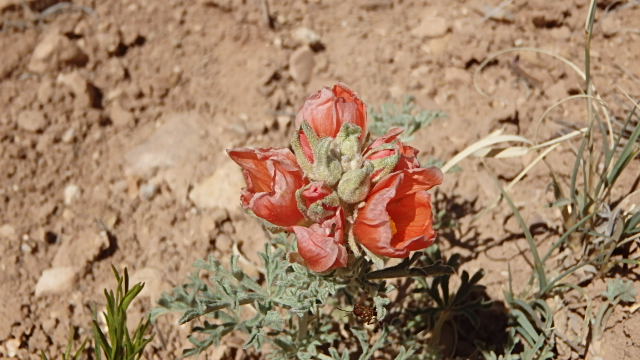
We haven't had a lot of rain here in the month of April, but we had enough to help the desert flowers here bloom right on cue.  I went for a good hike following the last snow storm and the extra moisture made for some showy wildflowers all along the trail.


Saturday, May 13, 2017

Planting: Summer Squash and Watermelons

The days are growing warmer and the nights are staying well above freezing so the time has come to plant some of my warmer weather crops.  Today's focus was the summer squash and watermelon beds.  These beds are at the end of the garden because I expect these crops to grow long vines and fill in the space at the end of the yard.

 I put the summer squash in the second to last bed since most of these crops are a bush variety that shouldn't get too long, but still need a lot of room for their giant leaves.  I planted three varieties:  Black Beauty Zucchini, Yellow Straightneck squash and Patisson Gold Marbre Scallop.  This will be the first year that I have grown scallop squash and this variety can be eaten young like a summer squash or allowed to mature more fully to be eaten like a winter squash.  Each variety was planted in two "hills" next to each other with about three feet of spacing between the hills.  I laid down the irrigation with loops to go around each hill to ensure that each one would get plenty of water.  Each hill holds three or four seeds and will be thinned to the strongest in each grouping after they grow the first set of true leaves.


Once I confirmed that the irrigation was watering properly I mulched in the bed with a thick layer of grass clippings.  I pulled back some of the mulch that was right over the hills because I wanted to make sure that the newly planted seeds got enough warmth and light to germinate.


This area was engulfed by ragweed last year, so I am hoping that the thick mulch keeps weeding this bed more manageable.   This area was also where the meat chickens spent half of the summer last year depositing manure, so the bed should have plenty of nutrients to feed the hungry squash plants.

In the last bed I planted my main crop of watermelons.  I only had six seeds from a watermelon that I had last summer, so each seed got it's own hill.  Hopefully they all germinate for me.  I expect that they will take some time to really fill out their bed so I planted a row of carrots down each side of the watermelons.  I plan to harvest these carrots in the fall after the first frost kills off the watermelons so I don't need to worry about digging them out when the plants are producing their juicy summer fruit.


I made rings around each watermelon seed like I did with the squash.  These crops can be very thirsty in the heat of the summer, so I want to be sure they are well irrigated.  Each row of carrots also got it's own drip line.  In this case I laid the line first, then sowed the seed on the surface of the soil next to the line.  All of the plantings were covered lightly with a small amount of grass mulch, then the gaps were filled in with a thick layer of clippings, again in the hopes of reducing weed pressure in this bed.


I will be checking the beds every few days to look for signs of germination.  Once things get established will be adding mulch as needed to keep out the weeds.


Tuesday, May 9, 2017

Planting Bush Beans

Warmer weather is on it's way, though you wouldn't know it if you went outside today.  We are supposed to have one more cold night here and then things should start to warm up.  I decided it was a good time to get another crop planted so I choose to plant a bed with bush beans.  The variety that I am trying this year is called Calima.  They are a filet type of green bean that are supposed to hold their pods at the top of the bush so I am hoping they are easy to pick.


For the actual planting process I used my hoe to make three trenches about 8 inches apart in the bed.  Each row gets it's own drip line and I punched extra holes in each line to make sure that the bed would be well irrigated.  Next I planted the seeds in each row at four inch spacing.  The planting directions call for planting them every six to twelve inches, but I expect that not every seed will germinate, so I can thin them later if I need to.


After I covered the bean seeds with about an inch of soil I turned on the water to make sure that the bed would be getting enough water.  Everything looked good, so I moved on to the final step of mulching the bed in.  I used grass clippings again since they are what I had on hand.  I spread them in a layer about an inch thick and then gave the bed a good soaking.  The mulch should protect the newly planted seeds from the next few cold nights and once they germinate they shouldn't have any trouble pushing through the thin layer to find sunlight.


Friday, May 5, 2017

Visits From a Fox

When I started my chicken growing adventures I knew there were lots of predators where I lived so I did what I could at the time to minimize them as best I could.  I choose to build small mobile pens that were covered to prevent hawks and eagles from eating my chickens.  I wanted to keep the floors open so the chickens could scratch and peck to their hearts content.  Making the pens mobile meant that I could "pasture" raise them (though my yard doesn't have much pasture as of yet).

My plans changed the other night after I heard a fox yipping for several hours close to my house.  When I woke up the next morning I found that it had dug under one of my mobile pens and snatched four of my young chickens in the night.  I know it was a fox because he was hanging around the front yard when I first looked out my window that morning.   I knew he would be back since he found such an easy meal so I got to work on making the small chicken tractor more predator proof.

The fix was a simple one.  I bought a roll of chicken wire that was wide enough to span the bottom of the run.  I unrolled it flat on the ground and then moved the run over the wire so that I could fasten the wire to the bottom using staples.  Now the fox could dig all it wants under that pen and it won't be able to get in.  In fact it has returned every night since to attempt to dig under the pen again, but it has not been successful and the remaining four young chickens are still safe.  I still wish that the chicks could scratch the soil more, but they will have to settle for pecking the grass that pokes up through the wire.  I am just happy that I won't be losing the rest of them to this persistent fox.

My concern now was that he would turn his attentions to the older chickens since he can't get to the smaller ones.  I don't think it would be foolish enough to dig into the big pen with the rooster in it, but he might try to get at a couple of hens that I have in another small pen. I decided that I should have another layer of protection for their safety, so I bought a new fence charger for the electric fence that runs around the yard.  The one that was lent to me last year stopped working some time last winter, but I hadn't really needed the extra protection until now.  I had to fix a few breaks in the wire and clear off the tumbleweeds that blow into the fence daily, but after a little while I got it up and running.  Hopefully the fox will get the hint when it visits next and move along to new hunting grounds.