Sunday, December 23, 2018

Spinning a Yarn

The weather has turned much colder in the last few weeks.  Our highs have hovered in the 30s and our lows have dipped into the teens overnight.  The days have become noticeably shorter as well and the sky is now dark by 5 pm.  This leaves a lot of indoor time for winter projects like crocheting hats and spinning new yarn.

I do have a few pounds of roving that I wanted to process, so I picked up where I left off last spring with a roll of white merino roving.  I spun the roving into thin singles and then double plied them into a soft worsted yarn.

The next step was to wind this bobbin of yarn onto a niddy noddy to make it into a skein of yarn.
A niddy noddy does two things.   First it keeps the yarn organized and untangled as it forms large loops that will become the skein.  Second it is a way to measure the length of the yarn so you have an idea of how much yarn you have to work with for a project.

From the niddy noddy, the new yarn gets plunged into a cold bath for a few hours to help set the twist in the yarn.
Setting the twist happens when the yarn fibers expand in the water.  The twist relaxes a bit and the yarn takes on a more even appearance.  I am careful not to agitate the yarn while I soak it because I don't want the fiber to felt.  After a couple of hours I gently squeeze the water out of the skein and hang it to dry for a few days.  Once it is completely dry I twist the yarn into a skein.

At this point the yarn is ready to become anything.  I can dye it any color I would like or just use it the way it is to make whatever I can dream up.  I don't have a set plan for this yarn yet.  I think this winter's goal will be to spin as much roving as I can to create a little handspun stash of yarn for all my future projects.  It will be nice to have a variety of my own handspun yarns to work with once I work my way through my fiber stash.


Wednesday, December 12, 2018

Bottling the Plum Wine, Round One

The first batch of plum wine that I started this summer had finally reached the stage where it was ready for bottling.  This wine was made with a red fleshed plum that I got a good deal on back in August.  Forty pounds of plums for $40 and a couple of jars of my homemade pickles.  All I had to add was a few pounds of sugar, some yeast and a few months of waiting to reach my finished product.
This lovely glass carboy holds approximately six gallons of wine when full.  To transfer this sweet treat into bottles I first had to prepare the bottles and corks.  One by one I washed and sterilized each bottle with boiling water and set them out to dry.

I was expecting about five bottles per gallon of wine, so I set out approximately thirty bottles (or equivalent) when I started transferring the wine.  I was pleasantly surprised when I needed to add a few more quart jars to the mix to catch the extra wine that I didn't have bottles for.  I ended up with about thirty five bottles worth of plum wine from this round of bottling.  The jars promptly went into the fridge for more immediate use since they were not sterile.


I did have a taste during the bottling process and was very pleased with the results.  The wine is sweet, but not overpowering and has very little dryness.  It taste like more of a dessert wine and seems to have an alcohol content to match.  It is very strong and very tasty which makes it go down easy. I will be sure to partake of this delicious treat in moderation now that I know of it's physical effects.  I'm sure it will bring plenty of holiday cheer to any party that I bring it to this winter season.

Tuesday, December 4, 2018

Cold Weather Canning: Tomato Sauce

The weather has been chilly for the past few days and it seemed like a good time to do something that would help warm up the house a bit.  I decided it was time to make a little more room in the freezer by making my frozen tomatoes into sauce.  The process is pretty simple, but very time consuming.

To start I put one bag of frozen tomatoes in to my big stock pot with a little bit of water and start thawing them out.  Once the first bag has melted enough I add a second and third bag until my stock pot is nearly full with thawing tomatoes.

Once all the tomatoes have melted down I run them through my food mill to remove all the seeds and skins.  Those go to the chickens for a special treat.  What I am left with is basically tomato juice.
The juice goes back into my stock pot where it continues to cook down until it reaches the thickness that I want.  This is the most time consuming part of the process as I have to be sure to keep the heat low and stir it from time to time to prevent scorching the bottom of the pot.
Once it has reached the thickness I want I start to prepare my canner and jars.  I add a tablespoon of lemon juice to each pint that I process.  I like to keep my sauce as simple as possible so that I can use it for a wide variety of dishes.
This round of sauce making yielded nine pints of sauce from approximately three gallons of raw frozen tomatoes.  I could have cooked the sauce down longer to make it a bit thicker, but I think for my purposes this is fine.  I did a second round of tomato sauce a few weeks later that resulted in thirteen pints of sauce.  That brings this years total for tomato sauce to twenty-two pints of sauce.  This was in addition to the forty-eight pints of salsa I canned this summer, the flats of tomatoes that I gave away at work, and all the yummy fresh tomatoes that I could eat.  I have to say that this was a very productive year for my tomatoes.

Tuesday, November 27, 2018

Making Full Use of the Thanksgiving Turkey


This year's Thanksgiving meal was a feast for two.  We cooked up a 15 pound turkey with all of our favorite sides, including an apple pie and a pumpkin pie made from scratch.  The turkey was by far my favorite part of the whole meal.  The first bite was well worth the wait.

The turkey was thawed for several days in the fridge.  The night before I cooked it, I set it in a pot of brine which helped flavor and add moisture to the meat.  The brine was a mix of chicken stock, water, salt and herbs.  The next morning it was rinsed and dried before I put it in the pan.  I smeared herb butter on the meat under the skin to help the skin get nice and crispy.  Inside the cavity of the turkey I stuffed chopped vegetables to help add more moisture and flavor to the meat as it roasted.  When it was done it, looked, smelled and tasted delicious.

We each ate a leg with our main course.  The breasts were carved into slices for sandwiches and all the other meat was picked from the bones and set aside for future soups, stews and pies.  The roasted bones went into the stockpot along with the leftover roasted vegetables.  I topped the pot off with water and then put the whole thing over low heat.  The stock simmered for at least 24 hours before I let it cool down and strained the solids from the broth.  I picked through what was left of the turkey and managed to find two more cups worth of meat scraps that would be a tasty addition to soup or sandwiches.  The leftover veggie scraps went to the chickens for a tasty treat.  The stock went back on the stove to reduce a bit further.  I was left with 12 cups of gelatinous savory turkey stock and 8 cups of shredded turkey meat when the whole thing was finished.

Some of the meat and stock then became the filling of turkey pot pie.  I used potatoes, carrots, onions and celery from my garden to round out the filling, as well as part of a bag of frozen peas.  I precooked the filling while we made the crusts for the pies.  The delicious smell that filled the kitchen once again was a testament to the tastiness of this turkey.  Once the crusts were ready, they were filled with the yummy stew.
Each pie was covered with the top layer of crust and then baked at 350 F until they were golden brown.  This round of pie making resulted in two 9 inch pies and two 6 inch pies.  Another round of savory meals from this very productive turkey.

When I finally get around to using the frozen left overs from this turkey, I think I will have gotten more than twenty meals from a single bird.  It seems to me that as long as one can make efficient use of every part of the turkey, it can be a very cost effective way to have many delicious meals from one small investment.  It just takes some time, patience and a little effort to make a little food go a long way.

Monday, November 19, 2018

The Great Potato Harvest

I have been slowly harvesting my potatoes since July, but now that cold weather has come to stay it was time to get all the potatoes out of the dirt before they froze solid.  I was pleased to find that the wrinkly, sprouted potatoes I had planted back in April grew into many good sized spuds that were nicely spread throughout the beds.  I filled a box and a half with an assortment of Red Chieftain, Purple Viking and Yukon Gold Potatoes.  Many of them were bigger than my hand.  All of them looked happy and healthy.

These potatoes went into my cold storage in the dark closet of my unheated back room.  Hopefully they will keep well for several months.  I am saving the biggest ones for baking.  The smaller ones will likely wind up in my breakfasts as fried potatoes.  I also want to try dehydrating some to see how they reconstitute.  They could make a great addition to back packing meals if I like the way they turn out.  I also intend to save a few of each kind for replanting in the spring.  I have been replanting saved potatoes for several years now and they seem to be doing better every year.  I have literally harvested over a hundred pounds of potatoes for the price of a few pounds of seed potatoes that I bought years ago.  Aside from the effort of planting and harvesting, these potatoes are virtually free.

Monday, November 12, 2018

Saving Seeds

This year I have decided to get a little more serious about my seed saving efforts.  Seed saving isn't terribly complicated for most plants and every crop will go to seed eventually if given the right conditions.  There are things to consider like cross pollination with unwanted varieties, but for the most part I keep things simple enough that it really isn't much trouble for me.  It also helps that I never liked pulling finished or overgrown crops so many things go to seed purely out of neglect on my part.  Because of this I didn't even need to plant lettuce, radishes, dill or cilantro this year.  All of those crops reseeded themselves without any help from me. 

One of the most important notes about seed saving is that whatever seed you collect should be as mature as possible.  Seed collected before it has "ripened" will likely not germinate, so I try to leave fruits on the plants as long as possible before I harvest them for seed.  Another thing you want to be sure is that you are collecting seed from heirloom, open pollinated varieties.  This will ensure that your plants will produce offspring that are like the parent plant, unlike hybrid varieties which may produce offspring that do not have all the same traits as the parent plant. 

One of the first seeds I collected this year were from last year's overwintered spinach.  They bolted early in the heat of summer and were heavy with seed by July.  When the plants were good and dry I simply went down the row with a bowl and knocked off the seed heads with my fingers.  I laid out the collected seeds on a paper towel for a few days to let them dry out a little more and then put them in a jar for storage.

Later in summer the lettuce bolted and a few weeks later they had produced hundreds of flowers.  The tiny yellow flowers gave way to tiny tufts of cottony seed parachutes ready to carry the lettuce seeds to their next destination.  I went through and gathered seeds from the different varieties and separated the cotton from the seeds before storing them away in jars.

I was surprised to find that I had also let some turnips get away from me and they made plenty of little seed pods while I wasn't paying attention.  I gathered the pods after they had dried on the plant and one by one cracked them open to remove the little round black seeds.

Some plants like tomatoes need an extra step in their seed saving process.  Fortunately tomatoes are one of those crops that you get to eat and save seeds from at the same time.  I always try to save seeds from the nicest looking tomatoes that ripen the earliest.  To save the seeds I first scoop them all into a jar and cover the seeds with water.  Tomato seeds have a protective casing that needs to come off before the seed can grow.  Soaking them in water for a few days helps to break down that casing.  Also, any infertile seeds will float on water, so it is also a good way to separate them from the fertile seeds which sink to the bottom of the jar.  After soaking them I give them one last good shake in the jar and then rinse off all the extra debris.  They then get spread on a towel to dry for a few days before finally getting stored in jars.

Cucumbers follow a similar process to tomatoes, but cucumbers should be well beyond the eating stage if you are saving seed from them.  I leave the nicest shaped fruit on the healthiest plants until they are yellow and firm.  To harvest the seeds I cut them in half and scoop out the seeds into a jar.  There I put them through the same soak and rinse cycle that the tomatoes went through before laying them out to dry.

This year I also had some carrots that went to seed unintentionally, but once I noticed they were growing seed heads I decided it was best to let them finish what they started.  Carrots are usually biennial which means that they will produce seed in their second year, but I think I had a couple carrots get ahead of themselves this year and they went to seed in their first year.  I harvested the seeds heads after the first frost when the plants had begun to dry out and brought the seeds inside to dry out further.

There are things that I won't be saving seed from mostly because they cross pollinate too readily and I grew multiple varieties in my garden this year.  Peppers are one of those things.  I grew varieties of sweet bell peppers and spicy jalapenos that would produce unpredictable offspring that could have a mixture of traits.  Another crop I don't save seeds from are my summer squash.  I grew three different kinds this year and their offspring would probably be a funky mixture of all of them if I grew them out next year.

The seeds I have saved will hopefully germinate well for me next spring.  By saving my own seed I am helping to preserve some genetic diversity in these crops while also acclimating them to my specific climate.  I can swap these seeds with other local gardeners and together we can help these heirloom varieties continue to thrive.  


Tuesday, November 6, 2018

Corn Harvest

This year's corn crop did very well.  The plants grew strong and tall in the summer heat and survived a few very windy days.  Now overnight temps are dipping into the 30's regularly and it is time to reap what I have sown. Many of the plants were taller than me and most had two or three ears on each stalk.  Unwrapping each ear felt like opening gifts because ear each of corn was a splash of color and the variations were endless.


This year I planted an open pollinated, heirloom variety called Glass Gem.  They can be used for popping or grinding into cornmeal.  I plan on saving seeds from the healthiest, most colorful ears for replanting next year.  The rest will become snacks for me and the chickens.  I am interested to see what the cornmeal looks like from these colorful kernels.

The two 20 foot beds that I had planted filled two boxes with these colorful ears.  Right now I am laying them out to dry in my back room because many of them were a little damp from the good rains we have been getting for the past couple of weeks.  When they are dry enough I will remove the seeds from the cobs and store them in jars until I want to use them.  

Saturday, November 3, 2018

Fall Garlic Planting

Many frosts have come and gone since the first killing frost of the season and few things are growing out in the garden now.  The only greenery that remains are my brassicas: broccoli, turnips and rutabagas, and my umbels: carrots, parsnips and celery.  I also need to finish digging my potatoes before the really cold weather comes.  In the mean time I am using this break from harvesting to clean up the beds a bit and to prepare them for next year.  I am also thinking ahead to spring planting and deciding what I want to plant and where.

First on the list every year is Garlic.  Garlic is the one thing that I plant in the fall.  It is a very cold tolerant plant and being a bulb, it does best when it is planted after the first frost in an area.  The bulbs will send up shoots when the weather warms in spring and they will be one of the first crops I can harvest in the coming year.  I always choose my largest, healthiest bulbs for planting to ensure that I get good sized heads next year.

I use only the largest cloves off of each head  and this year my tally was 90 cloves planted in a three by ten foot bed.  I like to give garlic some space because the mature plants can really spread their leaves by the end of the season.  I usually try to space them about six inches apart in a grid.
The garlic were planted in the bed that was formerly occupied by a variety of summer squash.  I raked the dead plant matter out of the bed and pulled any weeds that I could find.  I did a rudimentary turning of the soil with a shovel, then mixed in a bag full of leaves with a hoe.  In turning over the garden I came across tons of fat and happy earthworms.  I think my soil is getting healthier every year and the abundance of worms is great evidence of that.

I planted my garlic bulbs a couple of inches deep in this bed and gently back filled the holes.  I laid the irrigation lines back across the bed so they will be available for watering during warm, dry spells.  I will also mulch this bed in with straw to help protect the bulbs from the deep cold of winter.  In a few months, the dark green shoots will emerge from their winter slumber and launch themselves into another growing season.

Wednesday, October 31, 2018

Happy Halloween!

Wishing everyone a Happy Halloween from the Handspun Homestead!
May you share many bountiful harvests with your loved ones in the coming seasons!

Monday, October 29, 2018

Dehydrating Plums: Home Made Prunes

It is very late in the season for fresh fruit now, but I was gifted a small box of homegrown plums this week.  I hadn't really planned on getting more plums this year, but I wouldn't turn down free homegrown fruit.  I had plenty of plum wine brewing and I still had plum jam in my pantry from last year so I thought I should try something a little different with them.  I decided to dry them and add them to my collection of dried fruit.

Preparing them for drying is simply a quick scrub to make sure they are clean and then cutting them in halves to remove the pit.  Each half was then turned inside out to help it dry better and then placed skin side down on my dehydrator trays.

The drying itself took almost two days before they were done and they were still leathery and pliable when I finally took them off the trays.  These late season plums were super sweet and each dried plum tastes like candy.  I am happy to be able to add a few more quarts of dried fruit to my already brimming pantry shelves.

Saturday, October 27, 2018

Making Apple Cider Vinegar

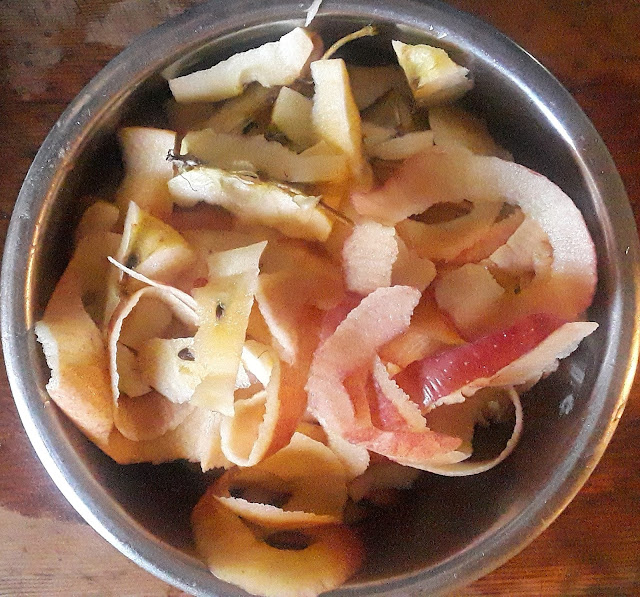
With my recent endeavor of processing a box of apples, I was left with lots of apple peels and cores that I didn't want to go to waste.  Normally I would just throw them into the compost pile or feed them to the chickens but this year I wanted to add an extra step to the process to make the most of what I had.  A good portion of the peels were cooked and made into apple cider that I will drink little by little over then next few weeks.  The rest of the peels would become something even a little better: apple cider vinegar.


I had looked up the recipe online and came across quite a few sites that had good instructions.  Basically they all called for fresh clean apple peels and cores, water, and a little sugar.  Pretty simple, right?  It's almost the same as making wine.  The only difference is that you want your juice to be exposed to the air, so it has aerobic fermentation as opposed the the anaerobic fermentation that makes wine.  I also am not adding yeast to the juice that will become vinegar.  I want the natural yeasts that grow on the apple peels to do the work.  They may take a little longer to take off, but I have plenty of time to let them do their thing.
After a week of hanging out in a warm part of the house, I strained out the liquid from the peels and put it back in the jars to let it ferment further.
It already has started to smell like vinegar but I imagine it will be several more weeks before it finished.  For now it can bubble away to it's heart's content on my kitchen counter.  This is my first time attempting to make my own vinegar and I am impressed by how simple the process is.  I am happy that I could make something useful from apple peels that would otherwise go to waste.

Thursday, October 25, 2018

Bottling the Cherry Wine

Months have gone by since I started my first batches of cherry wine for the year.  I started the wine with fresh boxes of cherries back in June.  I washed and pitted the cherries, then squashed them to release their juices.  The addition of yeast kick started the process and fermentation went on for several weeks.  Once things died down the wine began to clear and I racked it into a fresh carboy and let it rest an extra month before it would be ready for bottling.

Finally the day had come to bottle the wine for long term storage.  I went through the process of sterilizing all the bottles with boiling water and setting them out to dry.  Once all the bottles were ready I lined them up close to the carboy filled with cherry wine and then began filling them.  One by one each bottle took on the ruby red color of the dark cherry wine and when I was finished I had filled 15 bottles.

The rainier cherry wine was started a couple of weeks later, but followed the same process on a smaller scale as I was only making one gallon.  This variety of cherries for wine gave the finished product a much lighter rosy yellow color and it filled 5 bottles.

Some of these bottles have already gone to trade for various things such as boxes of fruit for future batches of wine.  At the low price I already paid for the fruit to make the wine, I feel like I may be getting the better end of the deal.  Either way, my stores continue to grow and I will be enjoying the fruits of my labors for months to come.


Monday, October 22, 2018

Preserving a Box of Apples

Fall fruits are in full swing here and this week I had the opportunity to work on a box of fresh gala apples.  I wanted to make more apple pie filling this year since last year's was a delicious success.  I also wanted to dehydrate some of the apples to add to my inventory of hiking snacks.

I began by peeling, coring and slicing the apples one by one.  I treated the apple slices in a lemon juice solution to keep them from browning.  Once I had enough apple slices for one round of pints in the canner, I prepared the sweet filling in a sauce pan.  It has to thicken a bit before it can be canned, but once it is ready I add the apple slices to the mix and then fill the pint jars.  It took about half the box of apples to put two rounds through the canner.  In the end I had made fifteen pints of apple pie filling.

The next stage of preserving the apples went much like the first stage.  The apples were scrubbed, peeled, cored and sliced.  They were also dipped in a lemon juice solution before being laid out on trays to dry.
The rest of the apples filled a little over six trays in the dehydrator.  When they were finished I had reduced over ten pounds of apples down to 9.5 ounces of dried apple slices.  These tasty treats will become a part of my fruity trail snacks that I will be eating when I go for hikes.

Thursday, October 18, 2018

Freezing Tomatoes

This year's tomato crop has been quite plentiful.  I ate what I wanted fresh, made four different batches of salsa, dried boxes of them and gave away more boxes of them and still they come.  Soon though there will no longer be garden fresh tomatoes so I am doing what I can to preserve my harvests as the season comes to a close.  In this case I am freezing them now to make sauce with them later when I have more time available.

The process is quite simple.  Each tomato gets washed and cored.  One by one they are cut into chunks and tossed into a gallon freezer bag.  I don't bother skinning them because the skins will fall off as they thaw when I am ready to use them.  Once a bag is full, I squeeze out all the air and then throw it into the freezer.  So far I have packed six gallons with tomato chunks, and may have to find room for a few more gallons before it is all said and done for the year.


When I am ready I will throw the frozen tomatoes into my big stock pot and cook them down.  After they soften a bit they are run through my food mill to remove the seeds and skins.  The skins and seeds will be bonus treats for the chickens (they really love that kind of stuff!).  The remaining pulp will continue to cook down until the sauce reaches the thickness that I prefer.  Last year I cooked down several gallons of tomatoes and only wound up with enough sauce for one batch of nine pints in the canner.  This year I am hoping to have more to show for my hard work because I specifically grew sauce tomatoes.  They have more flesh and less seeds than other tomatoes which will hopefully result in more sauce with less effort on my part.


Monday, October 15, 2018

Dehydrating Celery

Celery is one of those crops that I don't give much thought to during the growing season.  It takes a long time to grow to harvest size, so I usually wait until late summer/early fall to start collecting it.  I use celery in my soups and stocks and add it fresh to stir fries and salads for a little extra crunch.  It can tolerate some cooler weather, but not hard freezes so I am doing what I can to preserve some of my celery harvest while it's still here.

The easiest way to preserve celery is to dehydrate it or freeze it.  Dehydrating is as simple as washing the stalks, then chopping them into chunks and laying them out to dry on a tray.  I usually dry them on a screen because they shrink so much they will fall through the regular tray as they dry.  I only have one sheet like this for my dehydrator, so I can only do one tray at a time.  I don't use a ton of celery in my day to day cooking, so I should be able to dry enough for my purposes before the season ends.

If I end up with a lot of dried celery I may try grinding some and making my own celery salt for seasoning different dishes.  I have a whole bed of this stuff which is way more than I will use in a year, but if I can preserve enough I may be able to skip growing celery next year and just use what I have stored up.

So far I have fit over 60 celery stalks into this quart jar and there is still room for plenty more.  Hopefully the weather will cooperate long enough for me to finish filling this jar, but even if it doesn't I think I will still have plenty for this winter. 

Tuesday, October 9, 2018

Dehydrating a Box of Peaches

Signs of autumn are everywhere and the time for summertime fruits is coming to a close.  I picked up a box of some of the last peaches of the year at the farmers market this weekend for $26.  They were perfectly ripe and wonderfully sweet and I ate as many as I could fresh out of the box.  I have lots of jars of canned fruits in storage this year, so in an attempt to save space I decided to store this box by dehydrating them.  My dehydrator is limited by the number of trays that I have, so this endeavor took several days to work through the whole box.

One by one the peaches were washed, peeled, pitted and sliced.  I like my dried fruit a little chewy so I try to make the slices a little thick when I prepare them for dehydrating.  I laid them out on the trays as closely packed as possible and then stacked the trays up to dry.

The thicker slices take a little longer to dry, but most of them were done after about 24 hours.  Anything that wasn't totally dry by that time was promptly eaten.  When it was all said and done I had myself five quart jars filled with the sweetest, most delicious dried peaches I have ever tasted.  They will be great pick me ups on long hikes and I bet they would make some excellent peach cobbler when they are reconstituted.


Friday, October 5, 2018

Peppers by the Pound

Cold nights are fast approaching so I have been spending today harvesting things that won't survive the frost.  At the top of my list was the peppers.  The plants were heavy with fruit and they wouldn't have the chance to ripen further, so I went through and picked every last pepper that I could find.  I was rewarded with a rainbow of beautiful peppers.

I also picked about a gallon of jalapenos.

I already have plenty of salsa canned for the year, so I decided that I would keep these peppers in the freezer.  The large bell peppers will be stemmed and seeded then cut in half and frozen for stuffed peppers.  The smaller misshapen peppers will get sliced up into chunks and frozen in portions for adding to all kinds of dishes.  The jalapenos will get stemmed and seeded and then I will prep them to become poppers and freeze the leftovers for later too.  

Tuesday, October 2, 2018

Frost is Coming

A few nights ago we had a cold spell and some of the more tender veggies ended up with some frost damage.  It wasn't a killing frost, but it was close and I wasn't expecting it since the forecast was only calling for overnight lows in the 40's.  Daytime temps have still been up in the 80's here, but being that it is high desert here, night time temps do tend to have some wild swings at this time of year.

There are a few crops that I did want to protect from colder temps.  The tomatoes and peppers are still heavily laden with fruit that needs more time to ripen so I will be covering those with a sheet of heavy plastic to ward off the night chill for a few more weeks.  They can also enjoy a little extra heat during the day if I leave them partially covered.  Other crops like my cucumbers, summer squash and green beans will be left to their own devices, so I am making my final harvests in those beds this week.  I am excited that my late nights of canning pickles will be behind me for this year.  I will also be cutting and drying as much celery as I can to preserve it for future use in soups and chicken stock I will be making this winter.

Some crops like my root crops of potatoes, carrots and parsnip I will harvest at my leisure for quite a few more weeks.  Their tender tops might die back, but the ground will protect the roots from freezing for a few more months.  I will try to harvest all that I can before the ground freezes solid, but for now I will let the cold nights add sweetness to my carrots and parsnips. 


Saturday, September 29, 2018

Preserving a Box of Pears

Pears are one of my favorite seasonal treats but their season never seems to last very long.  I was able to get a decent price on a box of perfectly ripe Bartlett pears at the local farmers market and when I finally found a few hours to get some work done I went about the business of preserving them.

I started with canning them.  One by one each pear was peeled, quartered and cored and the pieces were soaked in a lemon juice solution to prevent browning before I processed them with light syrup in the canner.  I only did one canner load so I ended up with 8 pints of canned pears.


The rest of the pears were getting close to being over ripe and were very sweet so I decided to dehydrate what was left.  They were also peeled, quartered and cored before they were laid out on the trays to dry.  The end result were leathery pieces of pear that were so sweet that they tasted like candy.  I was able to dry ten pounds of pears down to a small enough volume that they only filled a quart jar.  I have a feeling that these sweet treats won't be around long, so next year I may have to be sure to make more.


Tuesday, September 25, 2018

Plum Wine: Round Two

The end of the summer fruit season is closing in and I have been working hard to preserve what I can in what little time I have available for my endeavors.  This weeks farmer's market score was a beautiful box of little Italian plums that I got for $20 and a bottle of Cherry wine.  The Cherry wine was just freshly bottled so I had another large carboy available to make more wine and so that is what I did with my fresh box of plums.


The 24 pound box of plums would be just enough to make four gallons of plum wine, but first I had to wash, pit, and chop up all the plums.  I think the whole process took me five or six hours, but it will be well worth the effort.
The sweet golden flesh of these plums is a stark contrast to the deep red plums that I processed for the other batch of plum wine that I started a few weeks ago.  I am curious as to the color difference in the final product of these two wines.  I also believe that these plums are a bit sweeter, so I am hoping the finished product becomes a wonderful sweet dessert wine.

One by one the plums filled the primary fermenting bucket and when I was done chopping I topped it all off with boiling water and several pounds of sugar.  After it cooled down for several hours I added a few key ingredients to help break down the fruit and add body to the wine and then let it sit for twelve more hours before I added the yeast.  It will spend about a week in the primary before I filter out the juice and transfer it to the carboy where it will finish fermenting and become wine.  I think I have now started enough wine to last me a very long time.  All that is left to do is to find a place to store all of it!