I guess some crops don't waste any time once they find the right conditions to grow. I planted a section of my extra bed with six rows of turnips just five days ago. Today when I went out to look at the garden, I was pleasantly surprised to find six short rows of new leaves peeking from the soil. Turnips don't seem to mind the cold, but I still covered the new sprouts with a thin layer of mulch since the weather was going to bring in some cold temps and snow in the next few days. Since turnips are a quick growing crop, I expect to be harvesting the first of them in early June. In fact they may be one of the first crops I get out of the garden.
Tuesday, April 26, 2016

Thursday, April 21, 2016
Fencing the Yard: Poor Man's Edition
A few weeks ago my friend and I started putting up a fence around my yard to protect both the garden and my chickens from roaming wildlife. I have seen several foxes in the area and have had deer tracks in my garden since we tilled up the beds. The fence supports were t-posts that we salvaged from the property and from a local metal recycling yard. The fencing however was going to be much more expensive if we didn't come up with something a little bit different. My friend had the idea of weaving a fence with discarded baling twine. Lucky for me there is no shortage of this in the area, since so many people own livestock and horses here. I asked a coworker that had horses if she had any twine laying around and was promptly rewarded with two huge bins overflowing with the stuff. My friend's father also decided to loan me an old solar electric fence charger that he wasn't using this season so I could add an extra layer of protection to my fence. Now all I had to do was buy some insulators for the t-posts and a small, cheap roll of electric fence wire and I would be set. My friend was kind enough to install all the insulators and the wire for me and he even hooked everything up to the solar charger. While he was doing all of that, I was busy tying lengths of baling twine together to make additional rows for the fence. Once we got all the long fencing installed we then started "weaving" in the extra baling twine to strengthen the fence and add more protection. We managed to finish one side that day and I will spend my extra time finishing off the project when I am able. The best part is that the fence holds a charge great (I tested it to be sure it was working properly....it was an electrifying experience!) even with all the baling twine woven into it. Hopefully the shock will be enough to deter foxes and deer from ever entering the yard.


All in all I spent only $45 for this whole fence! Thanks to the donated charger, the mostly free t-posts (I think I spent about $15 for the few t-posts that we needed to finish the fence) and the free baling twine, the only real costs were $20 for the wire and another $10 for the insulators. A great deal if you ask me!
Tuesday, April 19, 2016
Onions are Appearing
The weather has been doing a crazy spring flip flop this week and temps have gone from the 70's and sunny to 30's and snowy for the past couple of days. Despite the up and down temps, my onion sets have decided that it was still a good time to come up. I noticed the first tips poking up through the soil just a couple of days ago. It had only been nine days since I planted them, so I was pleased to see them so eager to grow. Hopefully the temps will swing back up in the next few days and things will really start to take off.


Monday, April 18, 2016
Chickens Out and About: Nine Weeks Old
The chickens have been doing well these past few weeks and now are about half the size of a full grown chicken. When the weather is nice and I have the time, I have been letting the flock run around in the yard for a few hours at a time. Today was one of those days and the chickens didn't waste any time venturing from the run and exploring what they could.


Sunday, April 17, 2016
Planting Strawberries
I had been debating on whether or not I wanted to plant strawberries here. I am only renting this property, so it doesn't make a lot of sense to me to invest the time and money into planting a perenial crop. However, I came across a good deal at the local farm supply store where I could buy a bundle of 10 bareroot strawberries for $5, so I bought two bundles. I don't think I would be too sad over losing a $10 investment when I move away, and I might just get my money's worth out of them before I go. If all goes well, I might even be able to take a few daughter plants with me if I time it right.
I bought two different varieties of strawberry. One is a June bearing variety called Honeoye. I like June bearing varieties because they make big, juicy berries. The other variety is called Ozark Beauty. These are an everbearing variety which means that I should get two crops from these plants: one in June and a second crop in the fall. These berries won't be as large as the June bearing variety, but getting extra strawberries (even if they are smaller) is never a bad thing!
I planted each kind in their own row in an arc around one side of the pine tree. I chose this location because strawberries like slightly acidic soils and pine trees tend to create that acidic environment. The other reason I chose this location was because it was close to the main garden and it would be very easy to run my drip irrigation to these beds as well. I didn't do any major soil prep for this bed since it wasn't in the original plan. I basically used a hoe to open up two trenches and then planted the strawberry plants about one foot apart down the row. After covering up the roots I installed some drip irrigation lines for each trench and gave all the plants a good soaking. Now all I have to do is wait for them to start growing!

I bought two different varieties of strawberry. One is a June bearing variety called Honeoye. I like June bearing varieties because they make big, juicy berries. The other variety is called Ozark Beauty. These are an everbearing variety which means that I should get two crops from these plants: one in June and a second crop in the fall. These berries won't be as large as the June bearing variety, but getting extra strawberries (even if they are smaller) is never a bad thing!
I planted each kind in their own row in an arc around one side of the pine tree. I chose this location because strawberries like slightly acidic soils and pine trees tend to create that acidic environment. The other reason I chose this location was because it was close to the main garden and it would be very easy to run my drip irrigation to these beds as well. I didn't do any major soil prep for this bed since it wasn't in the original plan. I basically used a hoe to open up two trenches and then planted the strawberry plants about one foot apart down the row. After covering up the roots I installed some drip irrigation lines for each trench and gave all the plants a good soaking. Now all I have to do is wait for them to start growing!

Friday, April 15, 2016
Extra Garden Beds Never Go to Waste
This year's garden plans had called for two beds of onions, but when I planted all of my sets in one bed, I realized that I would have a whole extra bed to play with. There were a couple of crops I had never grown before, and this was the perfect opportunity to try them out. A friend of mine also had some leftover kale seedlings that she didn't need for her garden, so she graciously donated them to me. I also didn't have a place planned for the celery that I had started, so that will make it's way into this bed as well.
I ended up dividing this bed into five sections. The section closest to the house will be for celery since this should make it easy for me to harvest. The second section will be the future home of the donated kale. The third section will be home to six short rows of a variety of beets. Beets have never been a favorite of mine, but I read that you can eat the leaves and I know some people that will take the beets that I don't like. The fourth section will be for six short rows of turnips. Turnips are something that I have recently discovered that I like, and if they do well, they may earn a permanent place in my garden rotation. The final section will hold a mixture of lettuces and spinach, with a few rows of carrots thrown in too. If everything grows well, this will be a great salad bar bed!

I ended up dividing this bed into five sections. The section closest to the house will be for celery since this should make it easy for me to harvest. The second section will be the future home of the donated kale. The third section will be home to six short rows of a variety of beets. Beets have never been a favorite of mine, but I read that you can eat the leaves and I know some people that will take the beets that I don't like. The fourth section will be for six short rows of turnips. Turnips are something that I have recently discovered that I like, and if they do well, they may earn a permanent place in my garden rotation. The final section will hold a mixture of lettuces and spinach, with a few rows of carrots thrown in too. If everything grows well, this will be a great salad bar bed!

Before I planted this bed I laid out my drip irrigation, so I can make sure that the newly planted seeds get plenty of water. The beets, turnips, lettuce and carrots are all in rows - one on either side of each irrigation line. The celery and kale will be planted in close proximity to the lines when they are ready to go in the garden. This will ensure that everything gets adequate water even after I add mulch to the bed.
Thursday, April 14, 2016
Setting Up My Drip Irrigation System
In the climate that I live in, irrigation is essential for growing a garden, whether I water the garden by hand, use a sprinkler, or install a drip line. I decided that a drip line would be the most effective and efficient way to water my garden. Using a drip line ensures that the plants that I want watered are getting enough without watering all of the surrounding weeds too. A drip line also decreases the amount of water that I would lose to evaporation if I used a method like a sprinkler or hand watered with a hose. It gets pretty windy out here, and a sprinkler can be pretty wasteful on a breezy day. A drip line is nice because I can mulch right over them which can double the effectiveness of my watering because it slows the moisture evaporation from the soil also. I have to use city water to irrigate my garden so I want to keep my water usage to a minimum by using as many water conservative methods as I can.
Setting up the system was easy once a had a crash course in drip irrigation from the local home depot employee. He was nice enough to explain to me how everything goes together and made sure I had what I needed to get started. I ended up buying a 50 ft length of 1/2 inch tubing to act as the main water line in the garden. Then I bought several 50 ft rolls of permeable 1/4 inch tubing for the lines that I would be using in the beds. I made sure to get the right connectors and end plugs to make everything work correctly. I also bought a roll of non-permeable tubing to connect the lines across the main pathway to keep me from turning it into a mud pit.
I started with the beds that I had already planted. The potatoes, onions and garlic each got three lines spaced evenly across the beds to make sure that every plant gets a fair share of the water.


The bed containing the peas and carrots only got two lines - one for each row of peas. This bed will hold the tomatoes in the summer and two lines should be enough for them also.
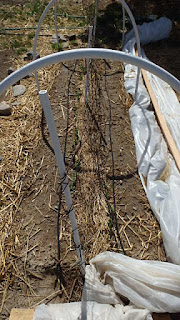
Setting up the system was easy once a had a crash course in drip irrigation from the local home depot employee. He was nice enough to explain to me how everything goes together and made sure I had what I needed to get started. I ended up buying a 50 ft length of 1/2 inch tubing to act as the main water line in the garden. Then I bought several 50 ft rolls of permeable 1/4 inch tubing for the lines that I would be using in the beds. I made sure to get the right connectors and end plugs to make everything work correctly. I also bought a roll of non-permeable tubing to connect the lines across the main pathway to keep me from turning it into a mud pit.
I started with the beds that I had already planted. The potatoes, onions and garlic each got three lines spaced evenly across the beds to make sure that every plant gets a fair share of the water.


The bed containing the peas and carrots only got two lines - one for each row of peas. This bed will hold the tomatoes in the summer and two lines should be enough for them also.
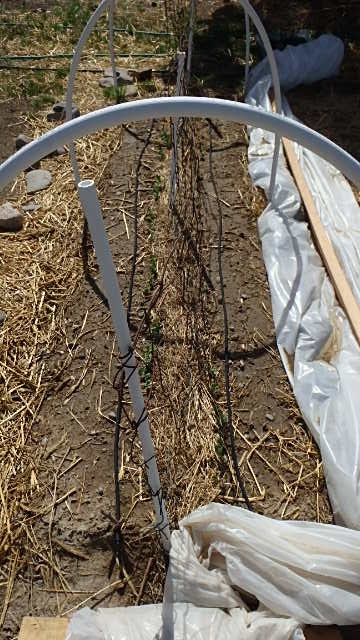
I am waiting to put the rest of the irrigation system in until I plant the remaining garden beds. This way I can make sure that the plants have the right amount of water piped directly to them because I will be able to put the lines in the right place. I will also be able to mulch over the lines after planting which will help keep moisture in the soil and keep the soil temperatures down which keeps plants happy even when the sun is beating down in the heat of summer.
This is probably the most expensive part of the whole garden this year. With all of the tubing I need to buy I expect to spend between $100-$150 on this project alone. I hope this makes up for itself by using less water overall and making efficient use of my time in the garden. It sure will be nice to water the whole garden by simply turning on the hose and letting it do it's thing. This will free up time for me to pull weeds and harvest crops instead of spending hours hand watering the garden. This might just be my easiest garden yet once I get all the prep work done!
Subscribe to:
Posts (Atom)