Thursday, May 19, 2016

Meat Chicken Tractor

So it has been a whirlwind of the past couple days, but I am so happy that we have been able to make a great start on the meat chicken tractor.  The biggest purchase for this tractor was the cattle panels that make up the supporting walls and roof of the structure.  The lumber was from a scrap pile of a very generous friend who also donated the clear plastic sheeting that makes up a portion of the roof.  The door to the enclosure only cost $4.00 at the local thrift store where we also bought a stroller for $10.00.  The stroller is supplying the wheels for the structure to make it easier to move.  Other odds and ends such as screws, staples and chicken wire fencing were bought from the local hardware store.


The first stage of the build involved attaching the cattle panels to boards using fencing staples.  Each of the long sides comes out to be about twelve and a half feet long and three cattle panels fit this length perfectly.  Once a board was attached to each side of the panels, we then bent the panels over and secured each end with an eight foot long board.  My friend then strengthened the corners by screwing diagonal supports in the base frame.  While he did this, I did my best to wire the panels tightly together to minimize their shifting and movement on the frame.

Once everything seemed to be in place, we added crossbeam supports at the back of the enclosure to help stabilize it and to give us a framework to attach the chicken wire to.  We then laid the tarps over the top and secured them to the frame with wire.  I am not going to enclose the whole structure in plastic at this point because the meat chickens won't need the extra protection from the elements since they will only be in here for a few months during the warmest season of the year.  I just want to make sure that they have good ventilation and a shady place to hang out on sunny, hot afternoons.

The next step was attaching the frame for the door and mounting the door in that frame.  It was just a simple matter of screwing boards to the bottom frame and then securing them in place at the top of the arch in the cattle panel.  We added a tie beam across the middle of the pen to keep the two long sides from bowing out in middle.   In the back half of the pen we added a couple pieces of a left over board to provide roosting spaces for the birds.  I may have to add a few more for them as they get bigger, but for now I think that two roosts is a good start.

The last big part of this project is installing the chicken wire around the bottom half of the enclosure to keep the baby chicks contained, and to keep predators out.  I will also use chicken wire fencing to close off the tops of the arches in the back of the enclosure and on either side of the door.  When the young meat chickens first move outside, I will probably have to come up with a temporary brooder area to give them a little protection from the wind and also to give them a place to warm up if they need it.  Hopefully, they will feather out well enough in a few short weeks to make the move to the great outdoors.

The final step will be to install the stroller wheels to the front of the tractor and also some kind of handle to the back so I can simply tilt the tractor up a little on to its wheels and move it around the yard.  I think this tractor is a perfect size to house my small flock of meat chickens.  It also happens to be a good size to fit over my garden beds once it is done being used to raise meat chickens for the summer.  For the fall it will probably become my season extending greenhouse and all I need to do is cover it completely with clear plastic to make this happen.  I may also use it for my egg chickens in the winter to give them a larger protected area to hang out in during the cold, dark months of the year.  They would probably do a good job cleaning up my garden beds for the next season while they add a good measure of fertilizer.

Tuesday, May 17, 2016

Cool Rock Trail Hike

The summer hiking season is just around the corner, so I am getting myself ready for that by going on shorter hikes at lower elevations where it is warm and dry.  This last weekend I had a chance to go on an excursion with my dog and I choose to go to a place close to my house.  I wanted to go somewhere that I hadn't been before just for a change of scene.  Cool Rock Trail is on the north side of the Black Canyon and starts near the bottom of the canyon by the Gunnison River.  I chose this hike because it sounded like it wouldn't be too difficult, but I didn't take into account how many ledges there might be to climb up in a canyon.  The first part of the trail was nice and easy and gradually rose through the bottom of the canyon.


The farther we went along the trail the closer the canyon walls became.  They towered over my head.

There were some neat looking rock formations that I found along the way.


As we moved up the canyon the trail became steeper and steeper.  There were many places that I had to climb up large boulders to continue on the trail.  I had to lift my dog up most of these as well, since he is getting too old to jump that high and I don't want him to re injure his knee.  I finally decided to turn back since this isn't a trail that he is fit for.  I would've liked to hike further up the trail, but the views coming back down were pretty outstanding.

There were also many desert bushes in full bloom out here and the air was heavy with the buzzing of bees around them.

Back at the trail head the other side of the canyon rises imposingly above the river.

Since the hike was a little on the short side, I walked up the road a bit and ate my packed lunch under the shade of an ancient cottonwood beside the river.  It was a peaceful place and I'm glad that I found a new place to hike near my house. Next time I come I will have to leave the dog at home so I can explore farther up this canyon.


Monday, May 16, 2016

Baby Chicks Are Here Again!

It didn't take long for the hatchery to fill my order of chicks.  They called me to see if sending the shipment in just a few days would be ok with me.  I didn't even have to wait for them to be hatched.....yet another benefit of ordering chicks that were on special.  All of the chicks arrived two days after I confirmed the order and when I picked them up from the post office, they were super active and chirping like crazy.  I hurried them home to get them into their brooder set up.  They started eating and drinking within seconds of being placed in the brooder and soon settled into their new home.  I was also happy to find out that the hatchery threw in a few extra chicks for free.  They probably expect a few to not make the journey, so a few extra is insurance that I get my full order if a couple die in transit.  I was pleased to see that all 28 chicks were happy and healthy (thats the same as getting three chickens for free in my book).  Since I don't know what breeds they sent me, it will be a kind of waiting game to see what they turn out to be.  It doesn't really matter what they are since they are destined for the freezer, but they were all supposed to be "heavy breeds"  meaning that they will make decent meat chickens when they reach maturity.  Many of them are probably roosters which is fine with me since they tend to make heavier birds anyways, and they will be young enough come butching time that they shouldn't be tough or taste different.


So far they all seem happy and healthy and when they are not dozing off they are running around like crazy and eating and drinking well.  

Friday, May 13, 2016

Interplanting Carrots

Carrots are one of the small crops that I tend to interplant with other crops instead of giving them their own bed.  This year I am trying to stagger my plantings of carrots so I can spread their harvest out over a longer period.  The first planting I made was way back in March when I planted my spring peas.  I only planted a handful of seeds in the corners of that bed and the seeds took a very long time to germinate.  I thought that starting them under a hoophouse with the peas would help them be warm enough to germinate, but I think they got too dry under there in the beginning.  Carrots germinate best in continually moist places.

The second round of carrot planting took place early last month when I planted up my "extra" bed.  Here I planted three rows of carrots alternating with some lettuce and spinach on the last few feet of the bed.  Other sections of this bed also included turnips, beets, kale and celery.  These carrots came up a bit better and actually started coming up around the same time as the first planting.  I'm guessing that I did a better job of watering these carrots which helped them come up quickly.

The third round of planting took place in my brussel sprout bed.  These carrots I planted in two rows, one on either side of the brussel sprouts which were spaced down the middle of the bed.  I am hoping that this is my "main crop" of carrots which is why I planted so many.  I am also hoping that they act as a ground cover for the brussel sprouts until they get big enough to shade out the weeds themselves.
I may plant a fourth round of carrots when I transplant my pepper starts into the main garden.  They will probably go in a single row down the middle of two rows of peppers.

I like to interplant carrots because they don't take up much space in a bed and I can get a good sized crop from what would otherwise be wasted space.  They work well with other plants because they are a taproot which doesn't interfere with most other plants more fibrous root system.  They might even help bring up nutrients from deep in the soil which can help feed the plants that are growing nearby.  They also tend to be a fairly low growing crop with feathery leaves so they won't steal any light from other crops that they are interplanted with especially if those crops grow taller than one foot.  They do make a decent ground cover once they get established, but they take such a long time to start filling out, that I have to be diligent about pulling weeds in the beginning.

Thursday, May 12, 2016

Spring Garden Tour

Spring has been coming along nicely and I thought I might share some pictures of the progress my garden in making this season.


The celery are making a comeback after they got off to a windy start in the garden.  

The kale are happily chugging along.

The beets have been slow to come up, but I just weeded them well and mulched them in so hopefully they will start to take off soon.

The turnips are quite happy and don't seem to be having any trouble with the wind, the rain, or the chilly temps.  At the rate they are growing I bet it will just be a month or two until I can harvest them!

This was the second planting of lettuce and spinach.  The spinach came up well, and the lettuce 
weren't far behind.  

The onions are looking very nice as well.  Just a couple of weeks ago they were barely peeking out of the ground.  I made sure to sprinkle another layer of mulch over them while they were still small, since it will be more difficult to do later when they really start to fill in the bed.

The garlic is looking fantastic.  Some of the bigger plants are nearly a foot tall already.  They will probably be ready to harvest in a month or two depending on how cooperative the weather is.

The peas are finally getting going.  Some have started wrapping their tendrils around the trellis, so it should just be a few more weeks until they start flowering and producing peas for me.  The first planting of lettuce is also finally making an appearance in this bed.  

On the other side of the peas I have a nice looking crop of spinach growing here.  It's finally big enough to start harvesting leaves from and I will be enjoying spinach salad regularly in the coming weeks.

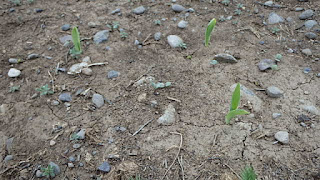
In the center long row, my gamble of planting early corn seems to be paying off.  The corn is sprouting all over this bed and once the weather warms up enough I expect it to shoot up quickly.  Once most of the sprouts get to be about six inches tall I will plant some pole bean seeds in this bed.

In the long row closest to the fence my assortment of sunflowers have started to come up as well.  I haven't seen any amaranth sprouts yet, but with all the rain we are getting, I'm sure it won't be long until they appear.

Last but not least, I am happy to see that the bare root strawberries I planted a couple of weeks ago are showing signs of growth.  I know I'm not going to get any berries from them this year, but if they do well then I hope to be adding berries to my freezer next spring.

I think that this is my favorite time of the year in the garden.  Everything is small and new and holds hope for a bountiful summer.  Hope you enjoyed the tour!


Wednesday, May 11, 2016

Decisions Have Been Made : Meat Chicken Project Begins!

I have done my research on raising meat chickens and I have decided to take the plunge!  I had originally planned on buying chicks from the local farm store, but after some internet searching I found that I could get a better deal on chicks if I ordered from a hatchery.  I looked up specials from a number of hatcheries and decided to order a batch of "special heavy assorted" from Cackle Hatchery.  I had heard great things about the hatchery and hope things go smoothly for my little chicks as they make their way across the country.  I got a good deal on 25 chicks for $1.20 each and the shipping was about $20, so for about $2.00 a chick I am getting started on my latest chicken adventure.

I have never mail ordered chicks before, so I'm not quite sure what to expect when the chicks arrive.  I hope that all of them survive the journey and I am excited to see what kinds of chicks they turn out to be.  Part of the reason they were so cheap is because I am getting what the industry refers to as straight run, meaning that the chicks could be either male or female.  That is just fine with me because they are destined for a date with my freezer in the long run, and I don't plan on keeping any as laying hens.  I may keep a rooster for a little while if I have one that would be suitable for a breeding program with my laying hens. It will have to be a very special rooster with not a mean bone in his body.  I won't tolerate a rooster that attacks me or that crows early and frequently.  I know that is a tall order, but I like my sleep, and I like to not be attacked by animals in my care.

Right now I have a brooding box set up for my new arrivals in the back room.  My friend lent me a large reptile cage that she wasn't using so I would have a large enclosure for the chicks.  I have a feeling that they will outgrow this tank in a matter of weeks, so the plan is to build a large run for them asap.

I decided on building the large run, mostly for the fact that it will double as a green house when it's done being used to raise meat birds.  It's might also become the laying hens quarters in the winter since it will give them a little more room than thier current enclousure.  Construction on that should begin as soon as I can pick up the matierals.  I can't wait to get started!

Monday, May 9, 2016

Happy Young Hens: Twelve Weeks Old

The teenage chickens are definitely looking and acting more like grown up chickens now.  They don't make the little peeps that chicks make anymore and they don't have any more fluffy little down feathers peeking out from under their big feathers.  They seem quite content in their little run and always get excited when they see me coming out to visit with goodies fresh from the cutting board for them.  I do let them out in the yard occasionally, but keeping them out of the garden when it is still young is nearly impossible.  They will just have to wait until they can't destroy my crops to run free in the yard again.

They are doing a great job destroying the weeds in their little run and I have decided to seed the run every time I move them with things that they would like to eat.  In a way they are helping me to prepare their own pasture, one movement of the run at a time.  They loosen the soil with their scratching and pecking and fertilize the area with their poop.  Every couple of weeks, they turn over a ten by three foot section of my yard and make it good for planting.  Hopefully by the time they have made their way around the yard it will be covered by good, healthy pasture plants that will help feed my own flock.

Sunday, May 8, 2016

Potatoes Are Up!

It's been nearly a month since I bought my seed potatoes.  I have been patiently waiting for them to break the surface ever since I planted them deep in their beds.  In the last week the ground was rising and starting to crack on the beds, so I knew that it wouldn't be long until they appeared, and now here they are!


Everything that has appeared so far looks vibrant and healthy!  Now I just need to keep them buried in mulch and in a few months I will be digging up one of my favorite staple crops: potatoes!  I am hoping to get more than 50 lbs between the two beds and I think that they are off to a great start.

Saturday, May 7, 2016

Getting Summer Crops In the Ground

Mother's Day is fast approaching and that is the typical planting date for most summer crops in this area.  I decided to give my started pepper and tomato seedlings a few more weeks before I transplant them because they are a little on the small side and the weather hasn't been nice enough lately to harden them off well.  I do think the weather is good enough to plant seeds of the other summer crops outside.  It has been cloudy and rainy here with temps on the cool side for the past couple of weeks, so the extra moisture should get the newly planted seeds off to a good start.

Before I planted any seeds I made sure that each of those beds were set up with drip irrigation.  I am loving how easy it is to water my whole garden with this system.  All I have to do is turn on the hose and let it run for half an hour or so.  Most of my summer crop beds only needed two lines per bed since those crops are spaced plenty far apart in their beds.

The first bed I planted was my bush green beans using a variety called Tenderette.  I only had enough seeds to plant two rows, though I would have liked to plant three or four.  Hopefully I will be able to save enough seeds to plant more next year if they do well.  Down the center of the two rows of beans I interplanted a row with a mixture of spinach and lettuce with a handful of radishes thrown in.  This was my third planting of lettuce and spinach, so I'd say I'm doing pretty well this year on staggering my planting dates with these crops to extend my salad season.


The second bed I planted was my squash bed.  I planted one hill of zucchini and one hill of yellow straight neck squash for my summer squashes.  I also planted one hill of acorn squash and one hill of a variety called sweet meat for my winter squashes.  I plan on planting a number of squash in one of the long rows with the corn.  In the spaces between the hills of squash I planted rows of parsnip along the drip line.  Parsnip is a slow growing root crop that can stay in the ground for a long time before I need to harvest it.  I am hoping that it gets a good head start on the squash so it can act as a ground cover in this bed while not interfering too much with the squash.  It is a good choice for this bed because I won't have to harvest it until after the squash are done growing for the season.


The third bed was planted with two rows of cucumbers.  On one side I planted with a variety called Miniature White.  This variety is supposed to be a compact bush variety that starts producing early.  The other variety is called Boston Pickling.  This variety is more indeterminate and produces good quantities of small crisp cucumbers perfect for pickling.  I am planning of putting a trellis on this bed as soon as the seedlings sprout.


The last thing I planted was a couple of hills of watermelons.  I haven't had good luck with watermelon in the past, so this year I am trying something different.  Instead of giving them their own bed in the garden, I just loosened up some dirt in a couple of hills next to the garden and planted them there.  I am hoping they get enough room to grow here without having to compete with other vining plants in the garden.

Friday, May 6, 2016

Taking a Gamble : Planting Early Corn

In years past I have grown a small patch of corn.  I grow a variety called Pungo Creek Butcher which is a type of dent corn that grows about eleven feet tall and makes these beautiful rainbow colored ears of corn.  Why don't I grow sweet corn?  Because I don't eat much of it and I'd rather make cornbread from my home ground corn meal.  I also want to use it to supplement my chicken feed.

This year I am using the x-tra long, narrow beds to try a little growing experiment.  In the bed closest to the road I planted a variety of sunflowers and amaranth.  I am hoping to use the seeds grown in this bed to supplement my chicken feed as well.

The second bed contains blocks of corn alternating with blocks of pole beans.  I planted this row with just corn for now so it can get a head start on the pole beans which I will plant in a couple weeks, when the corn is about six inches tall.  I planted this corn in late April, which is fairly early for this area.  So far I have been lucky and the seeds didn't start germinating until after the last frost which was just a few days ago.  I am hoping the weather cooperates and doesn't get too cold at night from here on out.  So far the forcast seems to be in my favor.

The last bed will also contain blocks of corn, but these will alternate with squash plants instead of beans.  I guess you could say that I am trying a modified three sister's approach.  I hope it turns out as nice as I envision it.  By the end of the season I am hoping to have a wall of sunflowers and tall corn blocking the view of the road.  

Thursday, May 5, 2016

Transplanting the Brassicas

A couple of weeks ago I decided that the broccoli and brussel sprouts were big enough to be transplanted outside.  I hardened them off for a couple of days before I planted them out.  This year I decided to devote an entire bed to broccoli and a second bed to brussel sprouts.
I planted twelve broccoli starts, eight of them were a variety called Waltham, the other four were a variety called Atlantic.  

I planted five brussel sprout seedlings, but only three of those were a decent size.  I was hoping to have more plants, and I may fill in spaces with nursery starts if I need to.  


On either side of the brussel sprouts I also planted a row of carrots.  When I was finished transplanting everything, I laid down a few rows of drip lines on each of the beds.  Over that I put down a thick layer of mulch.  Brassicas don't do well in the heat, but by mulching them deeply, I can help to keep their roots nice and cool.

As these plants grow I will probably add another layer of mulch to help keep down the weed population and to help hold moisture in the soil.  I am learning that keeping my garden well mulched makes the growing plants very happy in this dry and sometimes very hot climate. 


Wednesday, May 4, 2016

Contemplating Raising Meat Chickens

I was talking with a friend of mine about my chickens recently, and a thought was planted in my mind about the possibility of raising a few more chickens for meat.  As I looked over the garden, I could see that the chicken tractor with my six chickens that will become egg layers wouldn't take up much space in the yard, even if I moved it every couple of weeks.  However, the small size of the chicken tractor wouldn't have enough room for me to increase the size of the flock inside it, so I would have to build a separate chicken tractor just to house the birds destined to grace my dinner table.

This tractor could be made differently since I don't plan on keeping the birds around long enough for them to need a place to lay eggs.  I will only be using it for a few months during a warmer season, so I won't need to build a heavy duty shelter to help them keep warm either.  I still want the coop to be easy to move, so it would be nice to keep it light weight as well.

I was thinking about building a 8 x 10 foot wooden frame for the bottom and bending hog panels to fit the frame and act as a support for the roof.  The roof would just be a heavy duty tarp stretched over the panels and tied down to keep it in place.  I might also get a short roll of chicken wire to cover the bottom section of the enclosure to help with ventilation and to keep the younger, smaller chickens from escaping.  One side would have to allow easy access so I can change food and water as needed and get to the birds if I need to.  Or I might rig up a feeding and watering system that I can access from the outside to make things easy on myself.  I would also secure perches inside the enclosure so they would have a place to roost at night.  I think an enclosure this size could comfortably house between 20 and 30 birds.

The actual number of birds that I end up raising will depend on how much they cost and how much work I want to do when it comes time to harvest them.  If I wanted to raise several smaller batches over the season, I could just build a couple more of the smaller hoop house runs and raise five or six at a time.  I already know that this size run is really inexpensive to build and could be ready to use in just a few days.  I also know that they fit over my garden beds too, and might come in handy later in the season as hoop houses after the chickens go to freezer camp.  This size enclosure might work better than a larger one, because it is fairly light weight.  If I attached wheels to one end moving it would be simple too.

A larger run would be nice because then I could keep all of the labor to a minimum - only moving one run around would be easier than moving multiple smaller ones.  The run could also do double duty as a greenhouse in the off season and would fit nicely over two garden beds at a time - still leaving me a pathway down the middle for easy access.

Right now I am just in the planning stages of the whole process and I'm sure that things will come together at the right time.  I like to take some time to think about what I want before I actually start to build something.  That way I can work out the pros and cons of each idea before I actually build it.

Sunday, May 1, 2016

April Showers Bring May Flowers

I hope the old saying is true.  We have been having a bit of a wet spell here in the weather lately and things are getting a little muddy around here.  On the bright side, I don't need to water my garden.  Unfortunately it has also been on the cold side with this wet weather and the nights have dipped close to the freezing point a few times in the last week.  This doesn't really bother the plants that I have out in the garden right now since they are fairly frost tolerant.  I just hope the temps don't dip too low and kill my newly transplanted broccoli and brussel sprouts.  They are still a bit tender and might take a while to get more acclimated to the cold.  Cold weather also slows the growth of new seedlings, which slows down the start of the growing season, but things should bounce back in a week or so when things warm up again.  On the plus side, cold weather slows down the germination of some seeds which can save them from sprouting too early and getting killed by frost.  So far I have been lucky that my first round of corn seeds haven't come up yet since we got a little dusting of snow here, just a few days ago.  I think they will be in the clear if they come up in the next few days though.  It looks like the temps will start climbing from here.  If they survive the next few weeks, then I will have a bit of head start on the real frost free period which starts in a couple of weeks.  If not, then I will still have plenty of time to replant if I need to.  Some times spring plantings can be a gamble, but if you play your cards right, you can come out ahead.